Arduino简介
Arduino是一款便捷灵活、方便上手的开源电子原型平台。包含硬件(各种型号的Arduino板)和软件(Arduino IDE)。本质上,Arduino板是一块控制器,并且需要Arduino语言来操控。为了简化编程过程,语言界面甚至连主函数都不需要(似乎库用的是cpp文件)。
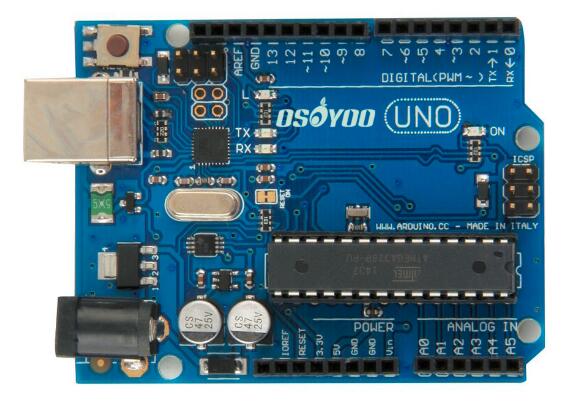
Arduino的一种,Arduino UNO板
如图所示,这个板上有许多针孔,这些叫引脚,用来从集中电路的内部电路引出与外围电路的接线。数字引脚通过编程来控制回路,GND是电源引脚,3.3V和5V都是稳定电压,其他的暂时可以不用管。圆形reset按钮会让单片机重新读取代码。SoftwareSerial库允许在任何Uno板上的数字引脚上进行串行通信。
初识IDE
安装好IDE和代码库之后,我们来看一下Arduino的一份代码文件的构造:
void setup()
{
Serial.begin(9600);
//Set the baudrate to 9600,make sure it's same as your software settings
//When accessing other devices (such as Bluetooth), we also have to agree
//with the baudrate of other devices.
}
void loop()
{
Serial.println("Hello World!");
//The serial will print strings:"Hello World!"
delay(5000);
// delay for 5 seconds(You can also change this numbers to config the delay time)
}
可以看到确实是没有主函数的。操作者只需要在setup和loop中「填写」想要完成的操作。
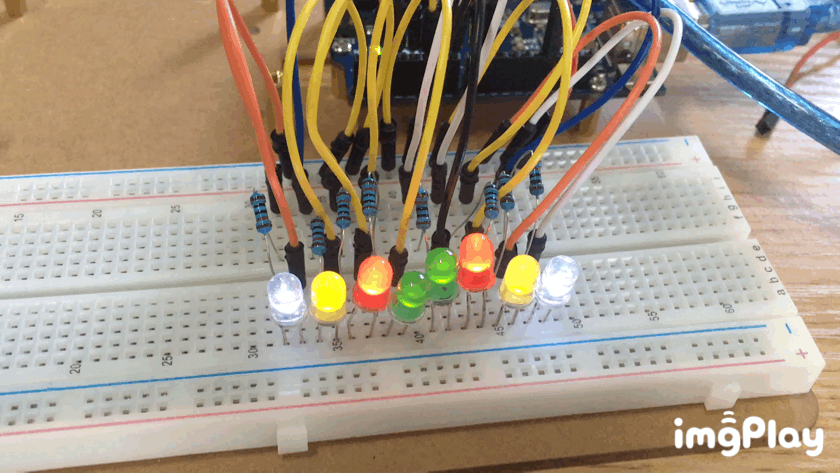
我们为了让代码烧录进Arduino板,需要用USB接线把板和电脑连接起来。在Arduino板上的其他引脚可以外部连接其他设备以达到「代码控制硬件」的效果。下面操作8个LED灯:
void setup() {
for (int i=2; i<=9; i++) //Set the pin2~pin8 cycle output
{
pinMode(i,OUTPUT);
}
}
void loop() {
for (int x=2; x<=9; x++) //Each LED will flash in one second
{
digitalWrite(x,HIGH);
delay(500);
digitalWrite(x,LOW);
delay(500);
}
}
}
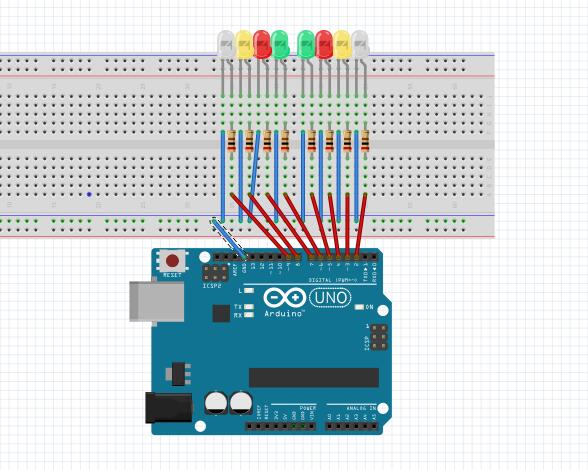
将灯泡的电线连进数字引脚2~9,然后循环写入信息,就可以得到循环亮灯的结果。在此基础上修改代码,可以实现酒吧等等场景常见的效果(修改后的代码丢了…只剩这个版本了,懒得写了)
可以感受一下……
int redLedPin = 2;   // Pin Red LED is connected to
int count = 0;

void setup()
{
pinMode(redLedPin, OUTPUT);   //Set led pin to output
Serial.begin(9600); //Set serial to the 9600 band
while (! Serial); // Allow serial to initialise
Serial.println("Enter Y to turn on the LED:");
}

void loop()
{
if (Serial.available())
 {
  char ch = Serial.read();
  if (ch == 'y'||ch == 'Y')
   {
   digitalWrite(redLedPin, HIGH);
   Serial.println("You have turned on the LED!!");
   Serial.print("The LED was off for ");
   Serial.print(count);
   Serial.println(" seconds");
   Serial.println("If you want to switch it off, simply enter N or n!");
   count = 0;
   }
  if (ch == 'n'||ch == 'N')
  {
  digitalWrite(redLedPin, LOW);
  Serial.println("You have turned off the LED!!");
  Serial.print("The LED was on for ");
  Serial.print(count);
  Serial.println(" seconds");
  Serial.println("If you want to switch it on, simply enter Y or y!");
  count = 0;
  }
 }
  delay(1000);
  count += 1;
}
另外这段代码就实现了在串口监视器控制灯泡的开关。可以根据这个手动调整舞台灯光之类的。